
Ever feel nervous about finding your way through a busy airport on your first flight? This guide breaks everything down into simple steps. We explain how to check in, drop off your bags, get through security, and locate your gate without any fuss. Follow these clear, step-by-step tips and enjoy a smoother travel experience.
Step-by-Step Airport Wayfinding Overview for First-Time Flyers
When you arrive at the airport, you're stepping into a clear and simple routine that guides you from check-in to boarding. Start by checking in online if you can. This option opens 24 hours before departure and may help you avoid extra fees, unless you need a visa or have special requests. Arriving early is key. For domestic flights, plan to be there at least 90 minutes ahead, and for international journeys, aim for 2 hours early. This extra time lets you confirm your boarding pass and review any airline rules before the terminal fills up.
Once inside, follow an easy sequence to keep everything on track. After checking in and getting your boarding pass, drop off any checked luggage or double-check that your carry-on meets the airline's guidelines. Next, head to security. You'll need to place liquids, electronics, and similar items in separate bins for screening. Finally, make your way to your designated gate and watch for the boarding call on the display. These clear, step-by-step actions help you move confidently through each stage of your journey.
- Check-in and boarding pass acquisition
- Baggage drop or carry-on verification
- Security checkpoint procedures
- Gate arrival and boarding call
Arriving at the Airport: Drop-Off, Parking, and Rideshare Options

Getting to the airport is easier when you plan ahead. Knowing your options for rides, parking, or public transit can make your journey stress-free. Here’s what to keep in mind:
- Rideshare Pickup: Book your ride in advance and check which terminal pickup area you need to head to.
- Parking Options: Learn the differences between short-term, long-term, and economy parking. Many lots offer free shuttles that take you straight to the terminal.
- Public Transit: Review local transit schedules so you know when and where to catch your bus or train.
- Flight Updates: Always check your flight status before leaving home using an airline app or the airport website.
Using apps for real-time traffic updates can save you from delays. Early mornings usually mean lighter traffic, making rideshare pickups or driving less hectic. Free shuttle services between parking lots and terminals add extra convenience. Airlines and airports now clearly mark rideshare zones, so you won’t have to worry about curbside confusion. A little planning goes a long way in helping you beat traffic and get to check-in and security with plenty of time to spare.
Check-In Choices: Registration Counters, Self-Service Kiosks, and Mobile Entry
When it's time to check in, you have options that cater to different needs. If you need extra help with visas or special requests, a live registration counter with an agent is your best bet. For a faster option, try a self-service kiosk where you can scan your passport or reservation code, choose the number of bags, and print your boarding pass and bag tags right away. If you like to go paperless, mobile entry via your airline app or an email link lets you grab a digital boarding pass on the go. Each method offers a mix of convenience and support, perfect for first-time flyers wanting to feel in control.
| Check-In Method | How It Works | Pros/Cons |
|---|---|---|
| Registration Counter | Talk to an agent for check in and help with special requests | Great for complex cases; may require waiting in line |
| Self-Service Kiosk | Scan documents and follow on-screen steps to print pass and bag tags | Quick and user-friendly; offers limited personal support |
| Mobile Entry | Receive a digital boarding pass via an app or email link | Convenient and eco-friendly; needs a charged device and internet |
For mobile passes, keep your smartphone charged and nearby. Save your boarding pass in the airline app or email so you can access it quickly. Many travelers also take a screenshot or back it up in a secure digital wallet for extra peace of mind. This print-free option simplifies travel, cuts down on clutter, and keeps you prepared in case of any issues at the gate.
Baggage Drop and Carry-On Guidelines: Weighing, Tagging, and Size Limits
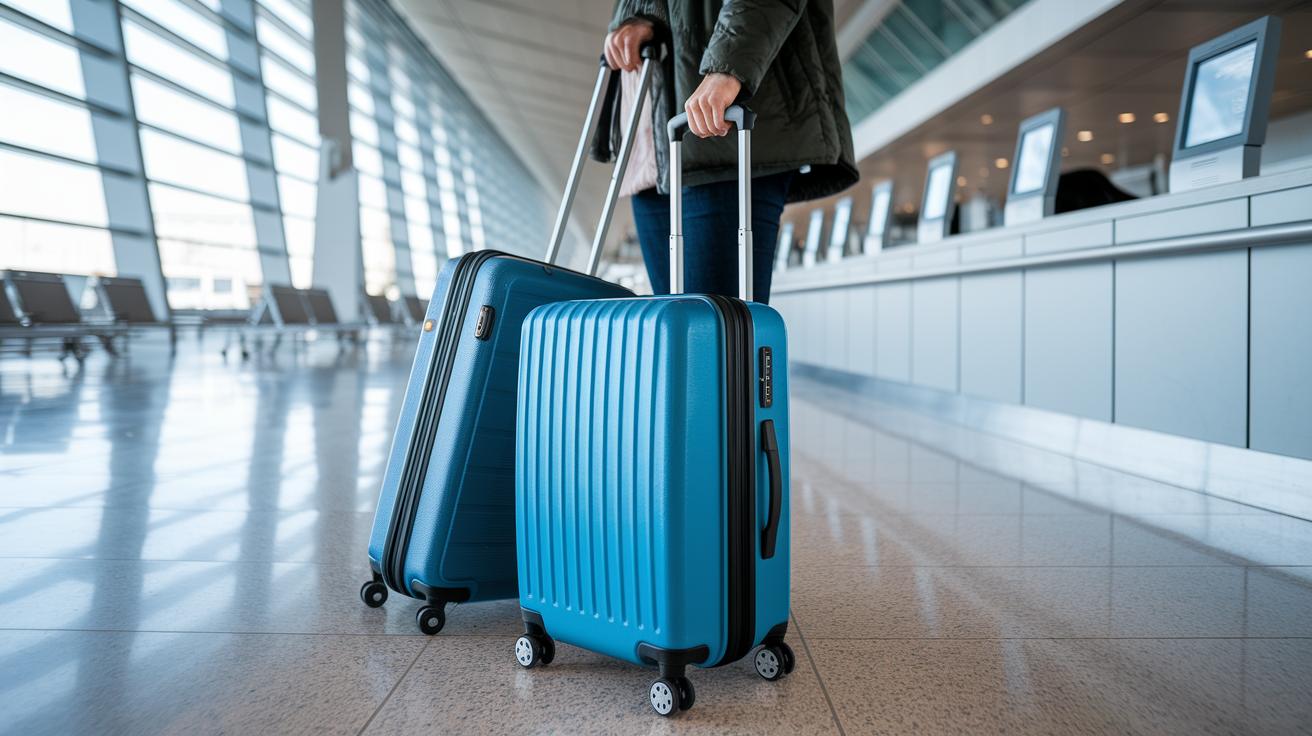
When you start your check-in, remember the baggage rules. Most airlines let you bring one carry-on and one personal item. Your carry-on is usually about 22×14×9 inches, but check your airline’s rules to be sure.
Once you have your boarding pass, go to the bag drop counter for your checked luggage. At a self-tag kiosk, an adhesive tag prints automatically. Just stick it on your suitcase handle. Be sure to keep important items like electronics and documents in your carry-on. Both your carry-on and checked baggage have weight and size limits, so following these steps can help you avoid extra fees and delays at security and boarding. Always double-check the rules on your ticket or at the bag drop counter to keep everything in order. Clear labeling, neat packing, and checking weight limits will save you time and reduce stress at the airport.
- Item security: Keep your valuable items in your carry-on.
- Tag use: Make sure the adhesive tags are securely attached to your checked bags.
- Weight checks: Verify that your bag meets the airline’s weight limits.
- Carry-on packing: Stick to the required dimensions for your carry-on.
- Lock use: Use TSA-approved locks for your checked baggage.
| Item Type | Max Dimensions | Weight Limit |
|---|---|---|
| Carry-On | 22×14×9 in | Up to 22 lbs (varies) |
| Checked Bag | Varies by airline | Typically 50 lbs |
Security Checkpoint Walkthrough: Screening Procedures and TSA Tips
When you get to the security checkpoint, be ready to follow a few key steps that keep your travel safe and smooth. First, join the line where TSA officers will guide you to remove items that need extra screening.
Keep your liquids in a clear, quart-sized bag with each container under 3.4 oz. Place your laptop and any larger electronic devices in a separate bin. You’ll also need to take off your shoes, belts, and jacket so they can go through the X-ray machine one at a time.
Have your travel documents ready. Keep your boarding pass and ID handy because you’ll need to show them quickly. If you have special items like medical devices or mobility aids, let the staff know as you approach. Staying organized and paying attention to instructions will help you move through security with ease.
Here are some quick tips:
| Tip | Description |
|---|---|
| Liquids | Pack liquids in a clear, quart-sized bag with each container under 3.4 oz. |
| Electronics | Place laptops and large devices in their own bin. |
| Footwear & Accessories | Remove shoes, belts, and jackets to ease the X-ray process. |
| Documents | Keep your boarding pass and ID within easy reach. |
| Special Items | Inform officers about medical devices or mobility aids. |
| Follow Directions | Listen carefully to TSA instructions to avoid delays. |
Some terminals even offer touchless ID and boarding pass scanners. This modern option reduces physical contact and speeds up the check, making your security experience more efficient.
Terminal Layout Tips: Using Maps, Signs, and Facilities Effectively

Airports offer both physical maps and digital directories at info kiosks. These resources show you the whole terminal layout, highlighting key spots like restrooms, lounges, and dining areas. Colorful, easy-to-read signs guide you to your gate, baggage claim, and exits. Many terminals also use simple, universal icons so even first-time flyers can navigate quickly. Plus, mobile apps with interactive maps let you check your layout and get real-time updates right on your phone.
Clear, well-placed signs make moving around even easier. Bright colors mark different zones, and interactive kiosks combine digital maps with easy, step-by-step instructions. Even when the terminal gets busy during rush hour, these tools help you stay on track. Follow these steps if you need help using the facility guides:
- Find an info kiosk.
- Scan the digital map on display.
- Follow the colored signs that mark the gate areas.
- Check the gate info on posted schedules.
If you’re still unsure where to go, simply ask a staff member nearby or use the airport’s mobile app to get extra guidance. These simple tips can help you navigate crowded terminals with confidence and get to your destination on time.
Gate Procedures and Boarding: Final Steps Before You Fly
When you reach your gate, you'll see monitors that show your boarding group, seat rows, and live updates. This tells you to get ready for the last part of your journey through the airport.
- Check the monitors closely for any boarding call changes.
- Know your boarding group so you can join the right line.
- Keep your boarding pass and ID close by.
- Line up neatly when it's your group's turn.
- Act fast if the gate information or delays change.
If you face a last-minute delay or unexpected announcement, stay close to your gate. Use the airline app often to get real-time updates on boarding, delays, or changes that affect your group. This keeps you informed and ready. Remember to stay alert and patient. Sometimes, families or groups needing extra assistance board early, so be ready for any special arrangements nearby. While waiting, take a moment to rest, drink some water, and get mentally ready for your flight. This mix of calm and readiness helps you avoid any surprises when it's time to board.
Final Words
In the action, this guide walks you through check-in, bag drop, security screening, and boarding. It shows you how arriving early, using terminal maps, and following clear steps can ease airport stress. This step-by-step guide to airport navigation for first-time flyers helps simplify every phase, from online check-in to waiting near your gate. Use these tips as a quick checklist to save time and money. Enjoy a smoother airport experience and look forward to a pleasant flight.
FAQ
What to do at the airport step by step?
The question means you follow a clear sequence: check in and get your boarding pass, drop off bags, clear security, then proceed to your gate as directed by airport signs and staff.
What are the airport procedures for international flights step by step?
The question highlights that for international trips you should check in online, drop off checked baggage, clear security, and reach your departure gate at least two hours before your flight.
What to do at the airport step by step for a domestic flight?
The question indicates that for domestic travel you start with online check-in, then drop off bags, clear security, and get to your gate at least 90 minutes before departure to avoid delays.
I’ve never flown before; what do I do when I get to the airport?
The question advises first-time flyers to arrive early, check in, drop off bags, pass through security, and locate your gate by following posted signs and guidance from airport staff.
How do I check in at the airport for an international flight?
The question explains that for international flights you can use online check-in to save time or visit the airline counter if you must handle visa issues or special requirements.
What is the 3-3-3 rule for flying?
The question suggests a guideline, but there exists no official 3-3-3 rule. It is best to check with your airline or trusted sources to understand current seating and boarding policies.
What is the airport 45 minute rule?
The question describes a timing guideline where some airports expect you to finish check-in and security within 45 minutes before a certain point. Always confirm the exact rule with your airline.
What is the three seat economy trick?
The question implies a seating tip in economy to avoid the middle seat. This strategy is a personal choice rather than an official airline rule, so check your seating options when booking.